How to Replace a Shingle - DIY Roof Repair
10 Contractors announces its DIY guide with step-by-step instructions on how to safely remove and replace roof shingles.
Warning: Working on a roof is dangerous and can result in serious injury or death. It is always best to use safety equipment and have a helper present.
With that warning out of the way, let's continue...
So, you want to fix that eye sore of a roof shingle that is loose, worn or has blown off from a previous storm. Here are some step-by-step instructions on how to do so without seriously injuring yourself.
Skill Level Required:
- Advanced Handy Man/DIY Skills
Roofing Supplies Needed:
- Matching Shingles
- 10 Ounce Roofers Cement
- Roofing Nails
Roofing Tools:
- Hammer
- Flat Pry Bar
- Utility Knife
- Caulking Gun
- Ladder
Safety Supplies:
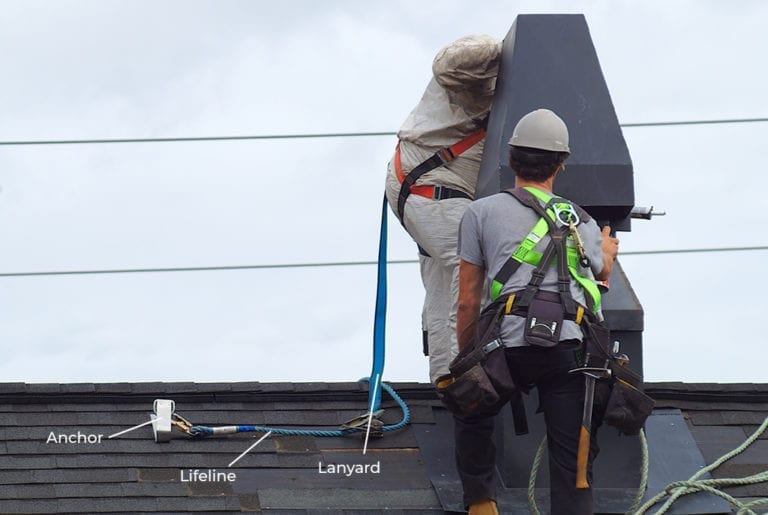
- Lanyard safety harness attached to the roof via anchor.
- Bungees/Tie downs to secure the ladder to the roof.
Additional Roofing Supplies:
If your roof is steep and not walkable, you will need the following roofing supplies:
- 3 Roofing Jacks
- 1 2x10x10 Wood Plank
- 16D Nails
- Extension Ladder
- Roof Flashing
- Metal Shears
Step-by-Step How to:
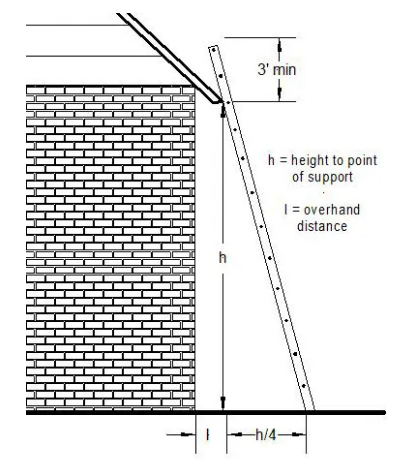
1. Position the Ladder
Set your ladder up in a safe manner, making sure the legs are firmly planted and stable, with the ladder extending 2 to 3 feet past the roof and secured to the roof using nails and bungees/tie downs.
After the ladder is set up, stand directly in front of the ladder with the tip of your feet at the base of the ladder, lift and extend your arms directly in front of you. With your arms extended, you should be able to make contact with the ladder somewhere from your finger tips to the middle of your palms.
You can also use the 4-to-1 rule: for every 4 meters of ladder/roof contact, place the ladder legs 1 meter away to get a safe ladder incline angle.
2. Is the Roof to Steep to Walk?
If the roof pitch is less than an 8/12 roof pitch and you can walk and work on the roof in a safe and confident manner, skip to step 4.
If the roof is steeper than a 7/12 roof pitch or you cannot walk and work on the roof safely, use a lanyard safety harness attached to a roof anchor.
Please follow all instructions provided with any safety equipment you use.
3. Roof Jacks
If the roof is an 8/12 pitch or steeper, it is best to use roof jacks for safety.
To use roof jacks, you have 2 options:
Option #1:
Mount the roof jacks to the roof using 2 16D nails to secure each jack to a rafter, keeping jacks spaced between 3 to 4 feet from each other. Keep in mind that center rafter spacing can vary anywhere from 16" to 24" on centers.
Option #2:
Mount the roof jacks to the roof deck using 3 16D nails to secure each jack; keep jacks spaced between 3 to 4 feet from each other.
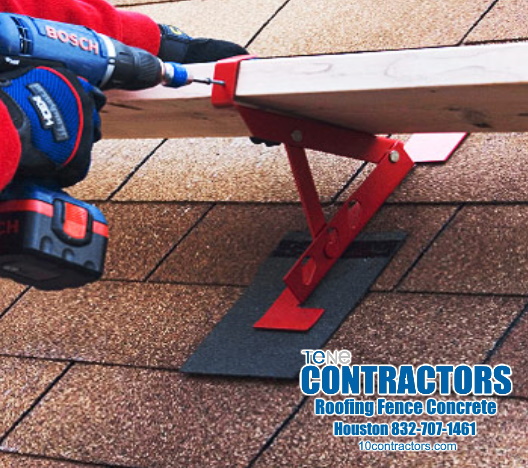
Install a wooden plank onto the roof jacks and secure each plank to the jacks using a nail in the hole located at the front of the jack. This will prevent the plank from rolling over or moving.
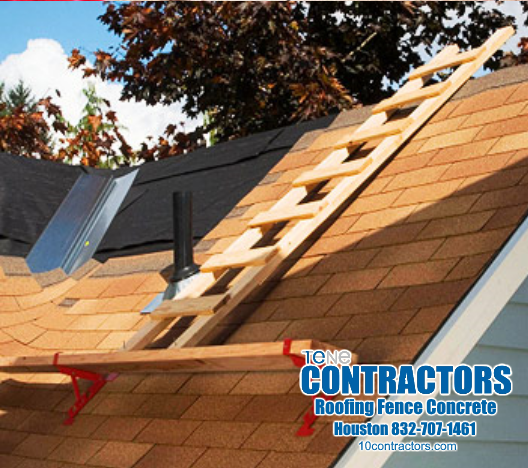
If the area you need to work on is out of reach, position an additional extension ladder or roofing ladder onto the plank, laying it on the roof deck with the ladder's feet positioned either in the middle of the plank or in between 2 of the jacks.
Once the ladder is in position, place 1 nail in front of each foot and 1 on each side to prevent the ladder from slipping or moving off the plank.
Note: When installing roof jacks, the weight capacity of the jacks are dependent on a combination of the mounting option used and the condition of the roof rafters and deck. Never attempt to work on a roof if the rafters or deck are rotted or damaged. Never use roofing nails to secure jacks, as roofing nail heads have a low shear strength and can snap off.
If conditions are acceptable and jacks are installed correctly, roof jacks will have a safe working load capacity of 250 lbs. per 8 foot section of the plank.
If you are keeping a bundle of shingles next to you while working, lay them on the roof deck and use the plank to prevent the shingles from sliding down the roof.
If working on a roof steeper than a 10/12 pitch, use commercial grade roof jacks, as they are stronger, more stable, and have a greater weight capacity rating.
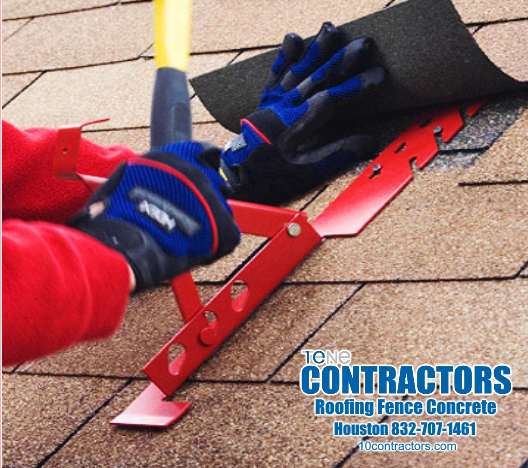
4. Remove Shingle
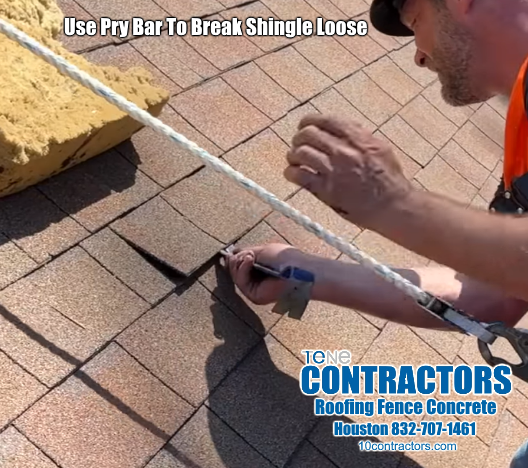
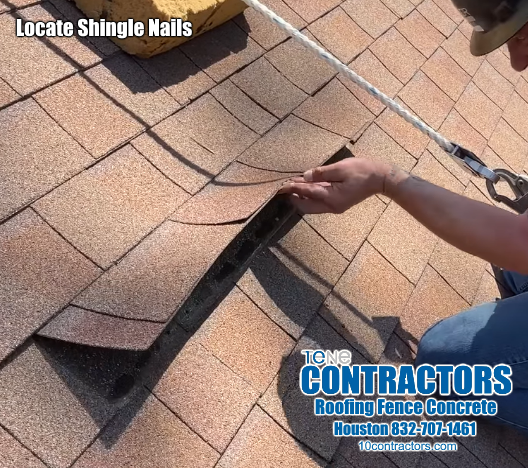
Using a pry bar, work your way under the front edge of the shingle you are replacing; gently pry up on the shingle tab.
Working from one end of the shingle to the other, break the bond from the shingle beneath the one you are replacing.
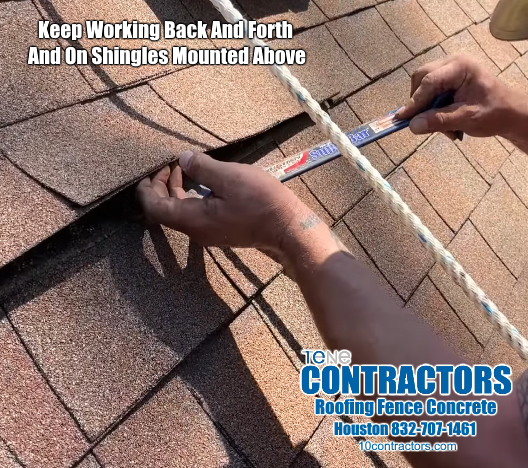
Next, loosen the bond of the tabs on the 2 shingles that are just above the one you are replacing; now use your pry bar and insert it once again beneath the shingle you are replacing.
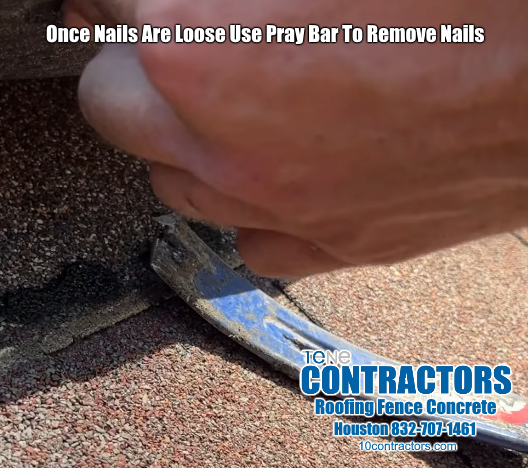
This time, work your bar gently all the way under the shingle; and to the location of each nail that is inserted, with a gentle motion, use the bar to pry the shingle and nail up to loosen the nails one by one.
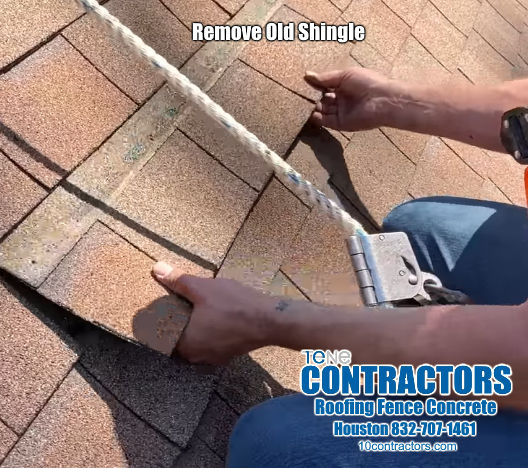
With nails loose, use one hand and gently lift the shingle tabs of the above shingle you are removing. This will give you access to the loose nails. Using the pry bar, pry the nails out one by one.
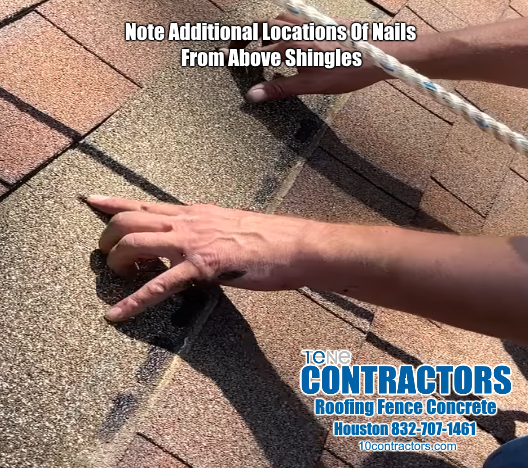
To remove a shingle being replaced, you will need to remove the nails from the shingles just above.
Note: Take care when using your pry bar not to pry to hard or you will damage the surrounding shingles. Take extra caution on old roof shingles or in cold weather, as shingles will be easier to damage. If any shingles are damaged, replace them.
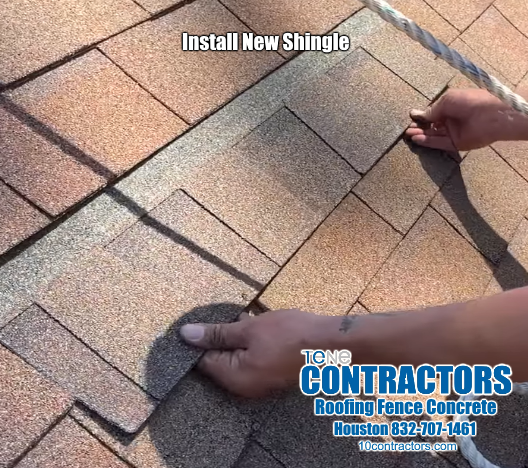
5. Install Replacement Shingle
- Slide the shingle into position.
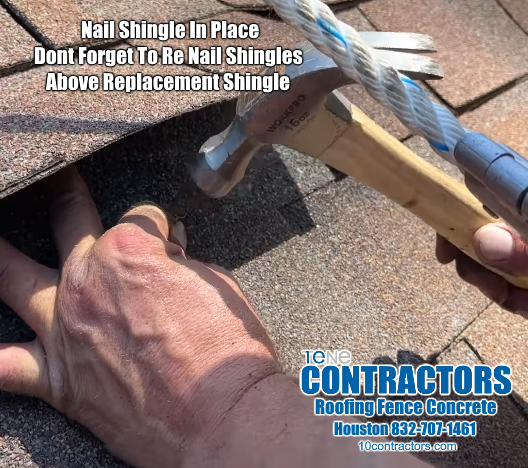
- Hammer nails into the shingle using the nail pattern of the shingle you removed.
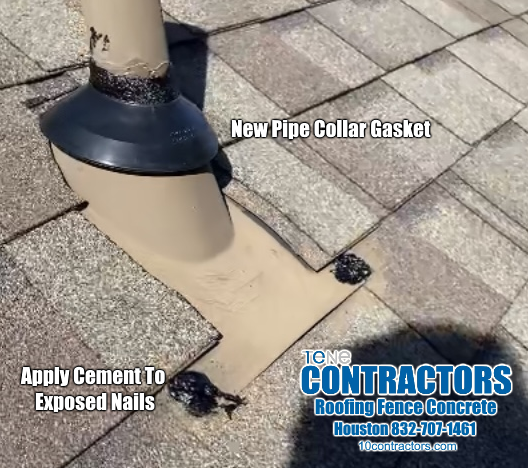
6. Inspect Roof Vents/Pipes
Now is a good time to inspect roof vents and pipes since these are the most common leak points on a shingle roof. Inspect pipe collars, mounting nails and for cracks.
If pipe flashing is in good shape, but the rubber gasket is questionable, install a rubber gasket collar over the pipe. Apply plastic cement on the pipe base, then slide the collar over and apply a ring of plastic cement on the top side of the gasket.
Apply a dab of plastic cement to exposed nails as needed.
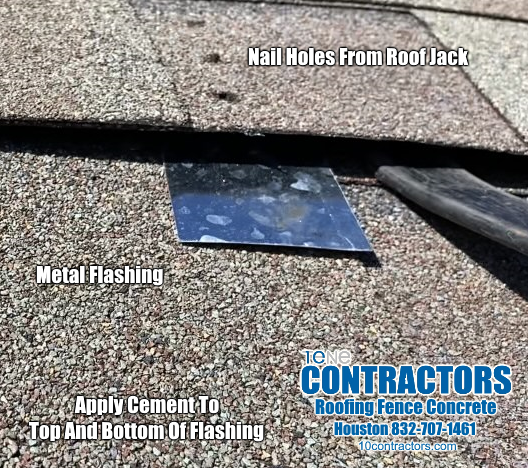
7. Apply Plastic Cement
Now that you are done, you may have holes from the nails you used to tie down your ladder or from the roof jacks you installed.
If a nail hole is exposed, using sheers, cut a 4x4 or 4x6 inch piece of metal flashing, apply some plastic cement on the bottom and top of the flashing, then slide the flashing under the shingle to prevent water from leaking through holes in the shingle. Once positioned, press down on the shingle to create a good bond.
10 Contractors can be found at 10Contractors.com.
David Tene
713-614-2337
https://www.10contractors.com
Ladder Safety
1. Position Ladder
Roof Safety Fall Hazard
2. Is the Roof to Steep to Walk?
How To: Roof Jack Installation
3. Roof Jacks
How to Install a Roof Jack
Install a wooden plank onto the roof jacks and secure each plank to the jacks using a nail in the hole located at the front of the jack. This will prevent the plank from rolling over or moving.
How to Mount a Roof Jack
If the area you need to work on is out of reach, position an additional extension ladder or roofing ladder onto the plank, laying it on the roof deck with the ladder's feet positioned either in the middle of the plank or in between 2 of the roofing jacks.
How to Replace a Shingle
4. Remove Shingle
DIY: How to Replace a Shingle
Next loosen the bond of the tabs on the 2 shingles that are just above the shingle you are replacing. Now use your pry bar and insert it once again beneath the shingle you are replacing.
How to Remove a Shingle
Working from one end of the shingle to the other, break the bond from the shingle beneath the one you are replacing.
How To: Shingle Replacement
Remove Shingle
How to Install a Shingle
5. Install Replacement Shingle
DIY: How to Install a Shingle
Hammer nails into the shingle using the nail pattern of the shingle you removed.
Houston Roofing Contractors
Inspect Roof Vents/Pipes
Houston Roofing Company
Apply Plastic Cement

Fall Hazard
Warning: Working on a roof is dangerous and can result in serious injury or death.